Menu
close


Learn how to fix a running toilet in 5 easy steps. Find the cause with a simple dye test, then adjust the chain, flapper, water level, or fill valve.
EyesMata is reader-supported. Some links on our site may be affiliate links, which means we may earn a small commission at no extra cost to you. Learn more.
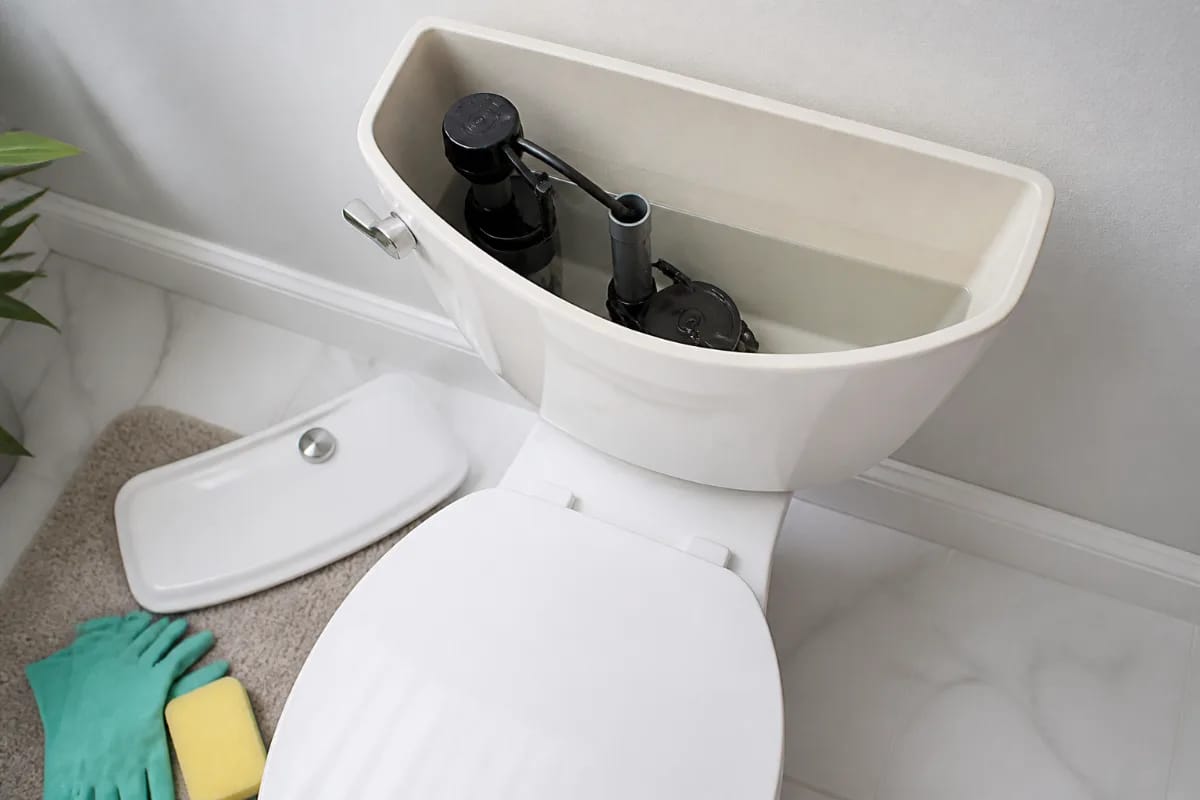
That quiet hiss from the bathroom at midnight. The toilet that refills by itself every half hour. A water bill that's creeping up for no obvious reason. A running toilet is one of the most common household annoyances, and the good news is that it's usually one of the easiest to fix yourself.
In most cases, learning how to fix a running toilet takes less than an hour, a few basic tools, and a replacement part that costs less than a takeout lunch. This guide explains why toilets keep running, how to find the exact cause, and five simple fixes to try, starting with the easiest.
A running toilet isn't just noisy. It wastes a surprising amount of water. According to the EPA's WaterSense program, a leaky toilet can waste about 200 gallons of water every day. That's water you pay for and never use.
Some leaks are loud and obvious. Others are silent, with water slowly seeping from the tank into the bowl. Either way, the cause is almost always inside the tank, and you don't need to remove the toilet or touch any pipes in the wall to fix it.
Lift the lid off the tank and you'll see a few key parts. Knowing what each one does makes the problem much easier to spot.
When a toilet keeps running, one of two things is usually happening: water is leaking past the flapper, or the fill valve is letting too much water in so it spills down the overflow tube.
Before buying any parts, take a few minutes to figure out what's actually wrong. These quick checks point you to the right fix.
The EPA recommends a simple test for silent leaks. Remove the tank lid and add a few drops of food coloring to the tank water. Put the lid back, don't flush, and wait about 10 to 15 minutes. If color shows up in the bowl, water is leaking past the flapper. Flush when you're done so the dye doesn't stain. Blue or green coloring works best. Kentucky's Energy and Environment Cabinet notes that red food coloring may stain the bowl.
With the tank full, look at the overflow tube. If water is spilling into the top of it, the water level is set too high or the fill valve isn't shutting off properly. Many tanks have a fill line marked on the inside wall. If yours doesn't, the water should sit below the top of the overflow tube. Fluidmaster, a major maker of toilet parts, recommends about half an inch below the top.
Does the toilet refill for a few seconds every so often, even when no one has used it? That on-and-off pattern usually means a slow flapper leak. A constant hissing sound usually points to the fill valve or a water level that's set too high.

Most running toilet repairs need only a few basic supplies.
If you're building a basic kit for small jobs like this, our list of essential DIY tools every homeowner should have is a good starting point.
Start with the first fix and work down the list. Many running toilets are solved by step one or two.
A chain that's too short holds the flapper slightly open, so water keeps trickling into the bowl. A chain that's too long can get caught under the flapper and stop it from sealing. Fluidmaster recommends leaving about half an inch of slack when the flapper is closed. Unhook the chain, move it to a different link, and flush to test. Make sure the chain hangs freely and doesn't tangle.
Flappers wear out. Over time, the rubber can warp, harden, or collect mineral buildup, and that leaves a gap. Turn off the water at the shutoff valve behind the toilet, then flush to empty the tank. Unhook the flapper and look at it. If it's stiff, cracked, or out of shape, replace it. If it looks fine, wipe the flapper and the rim it seals against with a sponge to remove grime, then reattach it.
Flappers come in different sizes, most often 2 inches or 3 inches, so bring the old one with you to the store. Install the new flapper, reconnect the chain with a little slack, turn the water back on, and do the dye test again.
If water is spilling into the overflow tube, the float is set too high. How you adjust it depends on your fill valve. Many modern valves have a small adjustment screw or clip on the side of the float cup. Older toilets may have a ball float on a metal or plastic arm, which you can lower by turning an adjustment screw where the arm meets the valve. Lower the float a little, flush, and check where the water stops. Repeat until it settles at the fill line or just below the top of the overflow tube.
The small refill tube should be clipped to the overflow tube so water flows in from just above the top. If the tube has slipped down inside the overflow tube below the waterline, it can siphon water out of the tank, which makes the fill valve turn on and off. Fluidmaster's instructions specifically warn against this. Pull the tube up and clip it in place so the end sits above the water.
If the water level is correct but the fill valve still hisses or won't shut off, the valve may be worn out. Universal replacement fill valves are inexpensive, come with clear instructions, and are a common homeowner repair. Turn off the water, flush, and sponge out the remaining water. Place a towel and bucket under the tank, disconnect the supply line, unscrew the locknut under the tank, and lift out the old valve. Install the new one following the package directions, adjust the height and water level, and reconnect the supply line.
Tighten plastic nuts by hand, and don't overtighten anything. Too much force can crack a porcelain tank or strip plastic threads. Once the water is back on, check underneath for drips.

Many newer toilets use a button on top instead of a handle, and they don't always have a traditional flapper. Instead, they use a flush valve with a rubber seal at the bottom. The same idea applies: a worn or dirty seal lets water leak into the bowl. Check your toilet's brand and model, which are often printed inside the tank, and follow the manufacturer's instructions for cleaning or replacing the seal.
Adding a quick toilet check to your routine makes these problems easier to catch. Our guide to simple home maintenance checks covers a few other quick inspections worth doing.
The fixes above are safe, simple jobs for most homeowners. Some situations are better left to a licensed plumber, though.
There's no shame in calling a pro. A small job done right is better than a bigger repair after water damage.
The most common causes are a flapper that isn't sealing, a chain that's too short or tangled, a water level set too high, or a worn fill valve. The dye test and a quick look at the overflow tube usually tell you which one it is.
Short refills every so often, sometimes called phantom flushing, usually mean water is slowly leaking from the tank into the bowl. A worn flapper is the most likely cause. A refill tube pushed too far down the overflow tube can cause the same pattern.
You can adjust the chain, float, and refill tube with the water on. To replace the flapper or fill valve, turn off the water at the shutoff valve and flush to empty the tank first.
Usually not, but it's worth fixing soon because it wastes water around the clock. If water is overflowing onto the floor or the toilet won't stop filling, turn the shutoff valve behind the toilet clockwise to close it, then work out the cause or call a plumber. If you can't fix it right away, closing the valve between uses is a simple stopgap.
Most DIY fixes cost very little. A chain adjustment is free, and replacement flappers and fill valves are among the cheapest parts at any hardware store. Prices vary, so compare options and match the part to your toilet.
A running toilet sounds like a plumbing problem, but it's usually a small part inside the tank that needs adjusting or replacing. Start with the dye test, check the chain and flapper, then work through the water level, refill tube, and fill valve. You'll save water, lower your bill, and finally get some quiet at night. For more beginner-friendly projects, our guide to easy DIY home repairs is a good next read.


